
A Beginner's Guide to Configuring Microsoft Sentinel for Enhanced Security
Explore how to leverage Microsoft Sentinel, a cloud-based SIEM and SOAR solution, to enhance your organization's cybersecurity posture. Follow this comprehensive guide detailing the configuration of Microsoft Sentinel, from setting up a Log Analytics Workspace to enabling MITRE ATT&CK coverage, and transforming data into actionable insights.
CYBERSECURITY INFORMATION TECHNOLOGY
Haseeb Ul Hassan
5/20/20244 min read
In today’s digital landscape, the importance of a robust security information and event management (SIEM) system cannot be overstated. Microsoft Sentinel provides a powerful, scalable solution for detecting and responding to threats. Here’s a detailed walkthrough of my recent project where I configured Microsoft Sentinel to bolster cybersecurity defences.
Step 1: Create a Log Analytics Workspace and Install Microsoft Sentinel Solution
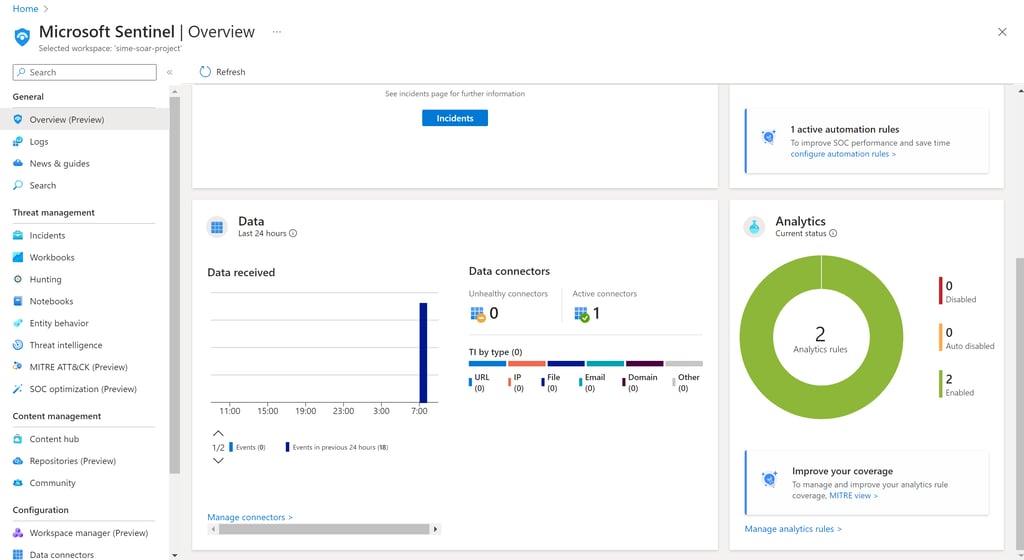
The first step was to create a Log Analytics Workspace, which is the foundation for Microsoft Sentinel. This workspace serves as a central repository for all the logs and metrics needed for threat detection and analysis.
Navigate to Azure Portal and click “Create a Resource”.
Search for Microsoft Sentinel service and click it to open the Sentinel page.
Click “Create” which will take you to the workspaces page. Select an already created workspace or click “create a new workspace” to create a new log analytics workspace.
Select the workspace and click the “add” to install the Microsoft Sentinel into the workspace.
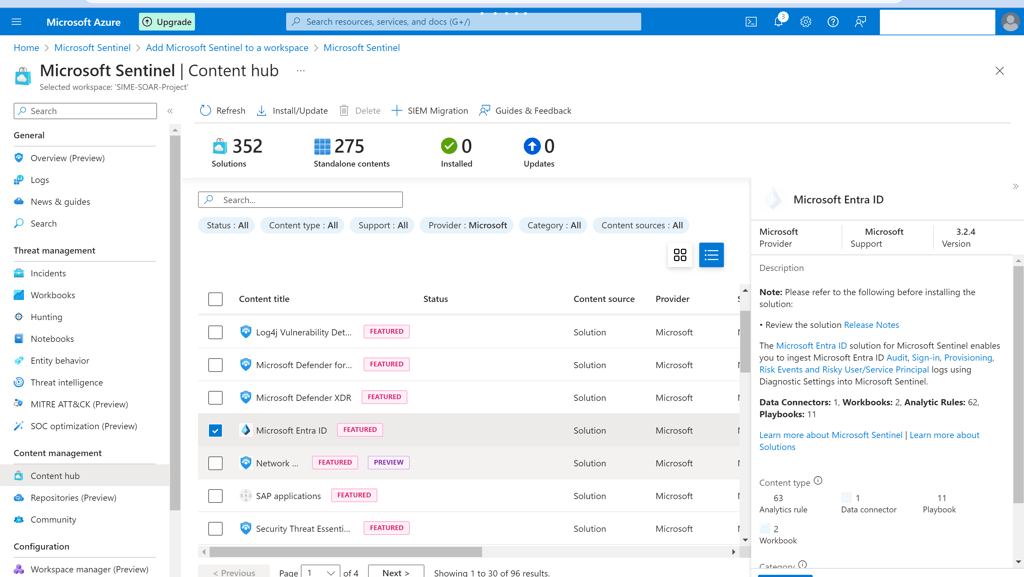
Step 2: Install Content Hub Solutions
To make Sentinel effective, it needs data from various sources. The Content Hub provides data connectors, analytic rules, workbooks, and other components not only from Microsoft but also from 3rd party vendors. After installing the solution, you need to configure them.
Open the sentinel workspace, select the Content Hub Management section, and choose Content Hub.
Select the solution you want to install like Microsoft Entra ID, Azure Activity, Microsoft Defender, Windows Security Events, etc.
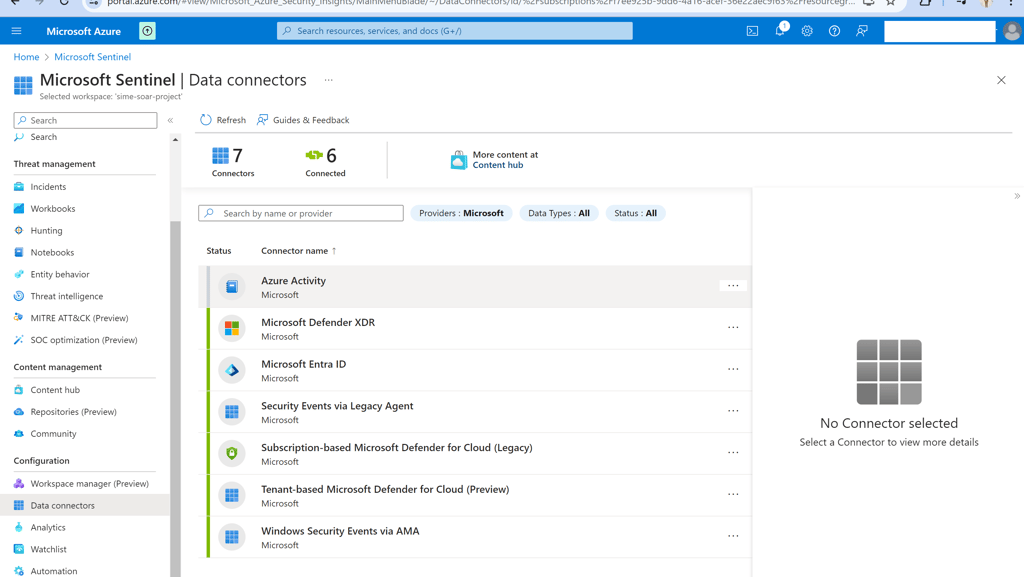
Step 3: Configure Data Connectors
After installing the content hub solutions, now configure the data connectors. Data connectors are the primary way data is ingested into Microsoft Sentinel. Since the data sources could be from Azure Resources, Microsoft 365, on-premise resources, or other cloud provider resources. Based on the resource type and location, configuring data connectors could be as simple as a few checkboxes or as complex as installing and configuring agents on external resources.
Navigate to the "data connector" tab in the Configuration section.
Click on each data connector to configure them.
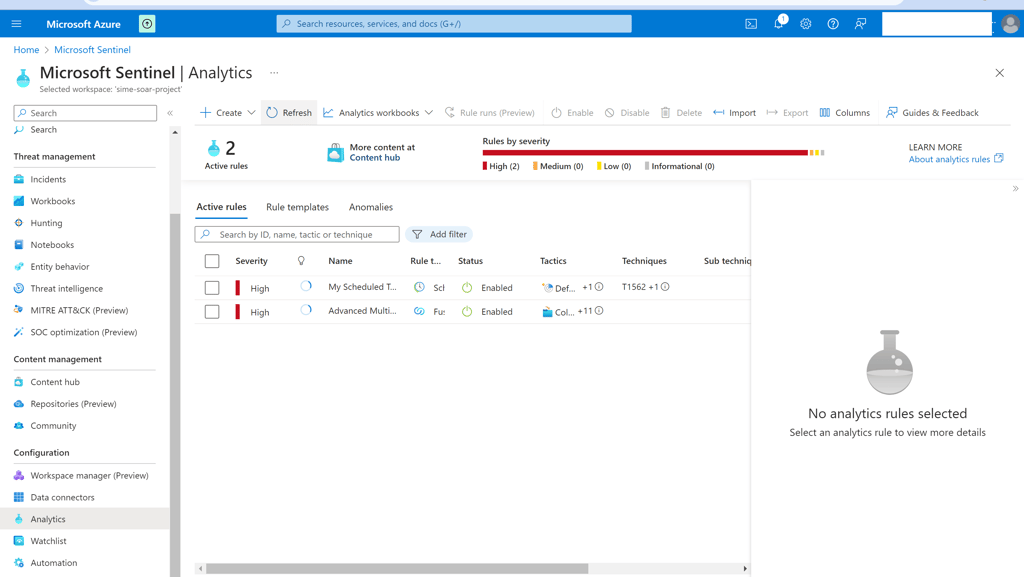
Step 4: Enable and Configure Analytic Rules
After connecting the data sources with the data connector, we need to activate or create analytic rules to monitor and correlate the data to generate alerts and incidents of suspicious activity.
Navigate to the Analytics tab in the Configuration section.
Create your own Analytics rule by clicking the “create” button or click the “Rule template" button to customize already created analytical rules.
Used the “Schedule Task Hide” template and customized it according to my requirements. This rule is used to detect attempts by malware to hide the scheduled tasks.
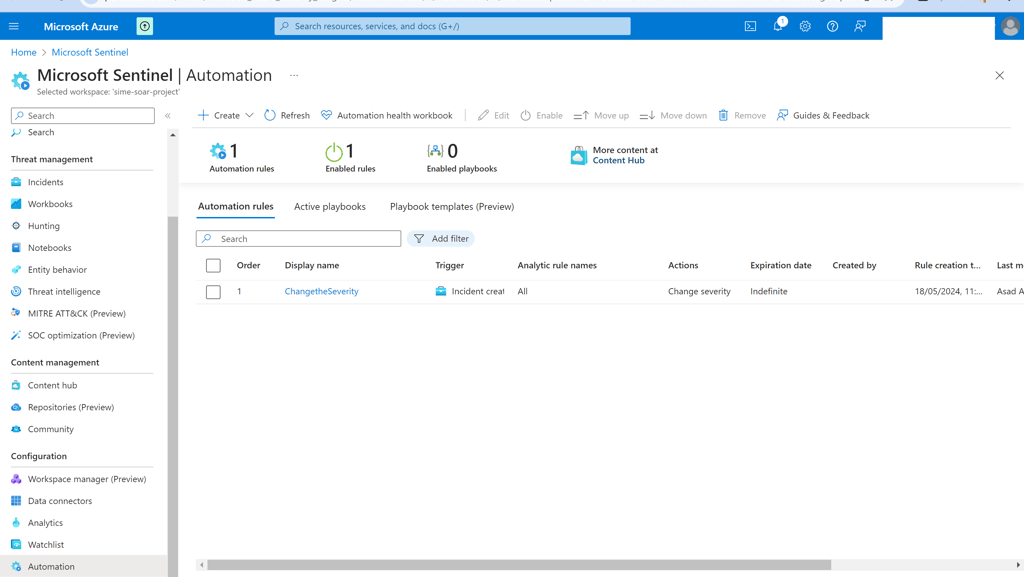
Step 5: Create and Configure an Automation Rule
To handle repetitive tasks and respond to incidents swiftly, we can use automation. There are two types of automation.
Automation Rules help you triage incidents in Azure Sentinel. You can use them to automatically assign incidents to the right personnel, close noisy incidents or known false positives, change their severity, and add tags. They are also the mechanism by which you can run playbooks in response to incidents.
Playbooks are collections of procedures that can be run from Azure Sentinel in response to an alert or incident. A playbook can help automate and orchestrate your response and can be set to run automatically when specific alerts or incidents are generated, by being attached to an analytics rule or an automation rule, respectively. It can also be run manually on demand.
To create an automation rule, go to the “Configuration” section and select automation.
To create an automation rule or playbook, click on “Create” and follow the prompt to complete the procedure.
Created an automation rule which will be triggered when an incident is created and it will change the severity to High.
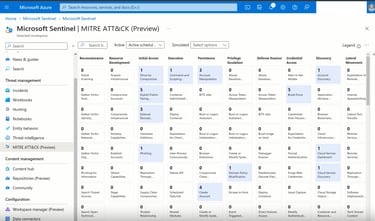
Step 6: Explore MITRE ATT&CK and Display Analytic Rule Coverage
MITRE ATT&CK is an industry-standard that classifies the different tactics and techniques that attackers use.
Navigate to the “Threat Management” section and select “MITRE ATT&CK (preview)” to open the page.
It displays the coverage of analytical rules against various threat scenarios helping identify any gaps in defences.

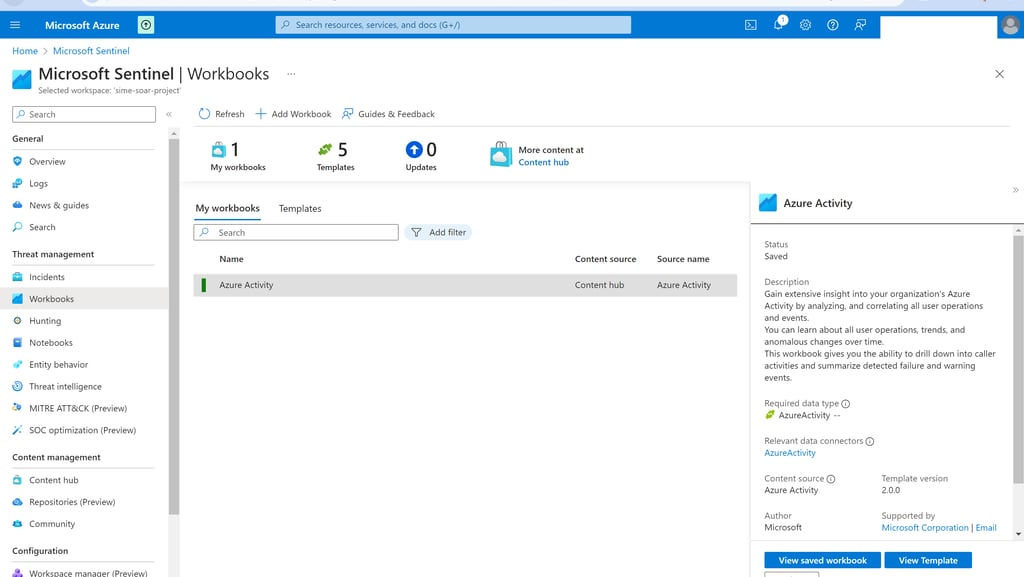
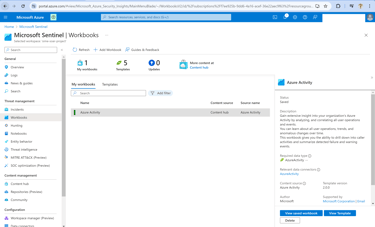
Step 7: Enable and Save a Workbook
Workbooks in Sentinel offer customizable dashboards that provide a graphical representation of your security data that can be used for threat hunting and investigation. You can create your workbooks, use the templates provided by solutions installed from the content hub, or customize the template.
Navigate to the “Threat Management” section and select “workbooks”.
Select “Templates” to customize existing workbooks or select “Add workbook” to add new workbook.
Conclusion
Configuring Microsoft Sentinel is a critical step in fortifying your cybersecurity infrastructure. By methodically setting up and customizing its components, you can leverage Sentinel's full potential to detect, analyze, and respond to threats effectively. This guide provides a foundational blueprint for harnessing the power of Microsoft Sentinel in your organization.